Here you go...
Here is a workflow for those who love HDR...
1) Set your ISO to 100 ( if you can go lower -go lower ) some cams can do 50 or even 25 iso. also make sure you are shooting these in jpeg ( works best for this technique )
2) Set Aperture to F8 ( this gives you a wider depth of field and helps with bringing out more of the detail which is what you are going after with HDR to begin with )
3)Set your camera on the tripod and compose the photo
4) start with the overexposure side by manually lowering the shutter speed so its 3 stops overexposed ( meter arrow should be all the way to the left ) record the image
5) incrementally take each shot as you move the shutter speed from overexposure to underexposure - being very careful not to shake the camera during your shutter speed adjustments ... a very light touch is required here.
6) your first shot should be overexposed but not completely white - your last shot should be underexposed but not completely black.
7) once you are done with all your shots you should have 6 - 9 images.
8) shoot as many different compositions as you like using this technique
Processing...
1) Dump your card with images onto your laptop / PC
2) open photomatix
3) choose anywhere from 3 - 9 images for your HDR
4) import them into photomatix by clicking "HDR" at the top of the screen on the left, then click "generate" - from there a window will open up and a tab that says "browse" - click browse and another window opens at the bottom it says "files of type" - click the drop down arrow and choose jpeg - next select the 3 - 9 images you want for this HDR and click "open" ... the images should now be in the load images box ready for processing. next click "OK" - a new box will open, select "align source images before generating HDR" then click "OK"
5) this will start the program to load the LDR images and process the first part of the HDR, when its done an image will appear that looks very contrasty - we are not done yet.
6) go back to the top and click on "HDR" again - a drop down menu will come down - click on "Tone Mapping" and a new window will open...this is where your best results will happen.
7) at the bottom set preview size to whatever you are comfortable with ( i like 768 because it makes the image bigger but still shows all the sliders )
8) above the preview size you will see "white clip" & "black clip" use these to adjust the white and black points of the image, when you move it you will see a change in the image...play with it and find a spot where you like it ( i will change these values in every image )
9) next up is micro smoothing, i generally dont mess with this too much, i leave it around 1/3rd the way across from the left edge.
10) micro contrast - i usually leave this on the middle setting
11) Luminosity... i usually change this according to the image but it stays a little more than 1/3rd across from the left edge, halfway between 1/3 and 1/2 is usually where i keep it ... slide it around and you will see the image go from contrasty to dull and dilluted - find a spot where you like it.
12) Light smoothing - never put it on the far left two positions - this is TOO MUCH .. use the middle setting sparingly. I almost always only use the two far right settings FYI
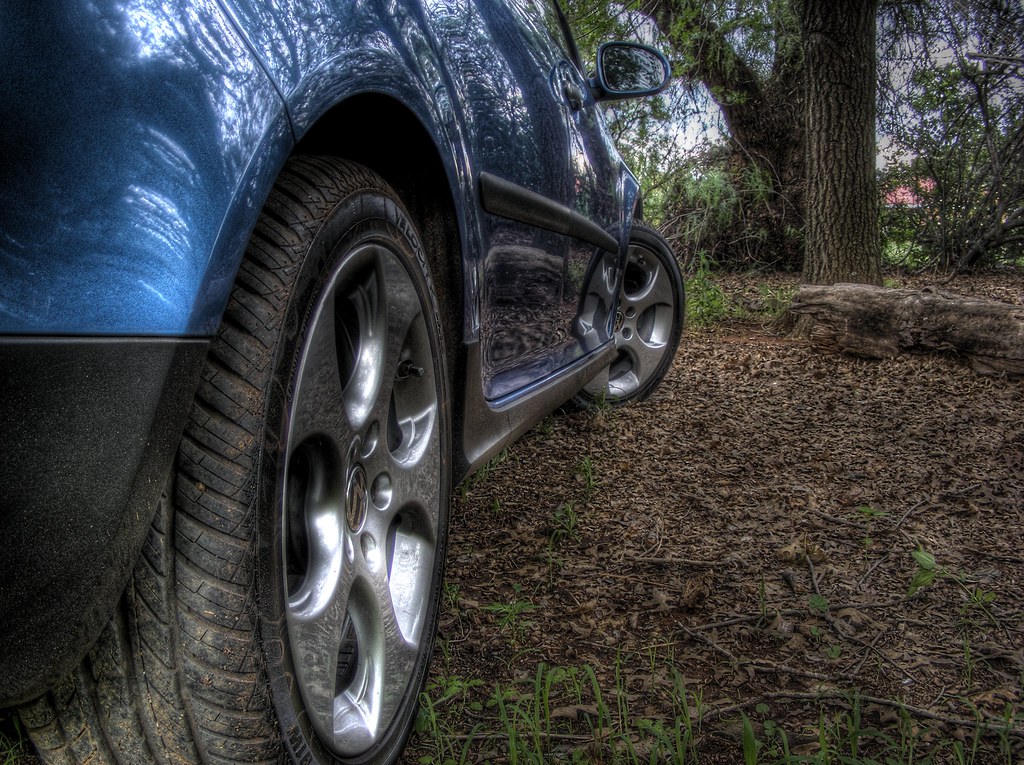
13) Color saturation - the photo below I had it set on 85
14) Strength i had it set on 79 - adjust as you see fit but try to always keep things so that you arent overdoing it, but play around and learn these controls.
Thats it - process that bad boy and wait for the finished version to pop up ...once it does Save it and import it into pshop for some fine tuning tweaks.
I wanted to share this workflow with you guys because a lot have asked how i get my images the way i do...this is what I use and how I do it. now you can to.
I do workshops from time to time, if any of you are ever in Vegas and want to learn, I give one on one or small group tours around Vegas to some great locations and you can learn a lot of these kinds of techniques and more - PM me for details.
now lets see those HDR's")

Here is a workflow for those who love HDR...
1) Set your ISO to 100 ( if you can go lower -go lower ) some cams can do 50 or even 25 iso. also make sure you are shooting these in jpeg ( works best for this technique )
2) Set Aperture to F8 ( this gives you a wider depth of field and helps with bringing out more of the detail which is what you are going after with HDR to begin with )
3)Set your camera on the tripod and compose the photo
4) start with the overexposure side by manually lowering the shutter speed so its 3 stops overexposed ( meter arrow should be all the way to the left ) record the image
5) incrementally take each shot as you move the shutter speed from overexposure to underexposure - being very careful not to shake the camera during your shutter speed adjustments ... a very light touch is required here.
6) your first shot should be overexposed but not completely white - your last shot should be underexposed but not completely black.
7) once you are done with all your shots you should have 6 - 9 images.
8) shoot as many different compositions as you like using this technique
Processing...
1) Dump your card with images onto your laptop / PC
2) open photomatix
3) choose anywhere from 3 - 9 images for your HDR
4) import them into photomatix by clicking "HDR" at the top of the screen on the left, then click "generate" - from there a window will open up and a tab that says "browse" - click browse and another window opens at the bottom it says "files of type" - click the drop down arrow and choose jpeg - next select the 3 - 9 images you want for this HDR and click "open" ... the images should now be in the load images box ready for processing. next click "OK" - a new box will open, select "align source images before generating HDR" then click "OK"
5) this will start the program to load the LDR images and process the first part of the HDR, when its done an image will appear that looks very contrasty - we are not done yet.
6) go back to the top and click on "HDR" again - a drop down menu will come down - click on "Tone Mapping" and a new window will open...this is where your best results will happen.
7) at the bottom set preview size to whatever you are comfortable with ( i like 768 because it makes the image bigger but still shows all the sliders )
8) above the preview size you will see "white clip" & "black clip" use these to adjust the white and black points of the image, when you move it you will see a change in the image...play with it and find a spot where you like it ( i will change these values in every image )
9) next up is micro smoothing, i generally dont mess with this too much, i leave it around 1/3rd the way across from the left edge.
10) micro contrast - i usually leave this on the middle setting
11) Luminosity... i usually change this according to the image but it stays a little more than 1/3rd across from the left edge, halfway between 1/3 and 1/2 is usually where i keep it ... slide it around and you will see the image go from contrasty to dull and dilluted - find a spot where you like it.
12) Light smoothing - never put it on the far left two positions - this is TOO MUCH .. use the middle setting sparingly. I almost always only use the two far right settings FYI
13) Color saturation - the photo below I had it set on 85
14) Strength i had it set on 79 - adjust as you see fit but try to always keep things so that you arent overdoing it, but play around and learn these controls.
Thats it - process that bad boy and wait for the finished version to pop up ...once it does Save it and import it into pshop for some fine tuning tweaks.
I wanted to share this workflow with you guys because a lot have asked how i get my images the way i do...this is what I use and how I do it. now you can to.
I do workshops from time to time, if any of you are ever in Vegas and want to learn, I give one on one or small group tours around Vegas to some great locations and you can learn a lot of these kinds of techniques and more - PM me for details.
now lets see those HDR's