08AhdowbanGTI
Ready to race!
- Location
- Seattle
So i posted pictures of my painted lowers in another section on this site and a lot of people wanted a full DIY so here it is from un-install to install!
MATERIALS:
300 Gritt Sandpaper X 4 pieces
600 Gritt Sandpaper X 4 Pieces
4 Cans of Duplicolor color code LB9A X 4
4 Cans of Duplicolor Clear Coat
3 Cans of Rustoleoum Sandable Primer (Light Grey)
1 Can of Duplicolor Adhesion Promoter
1 Roll of Tape
1 Roll of painters paper
1.) Remove all of your trim. Dont take the easy way out and just tape them off. It will come out bad , you will have tape lines, just take them off.


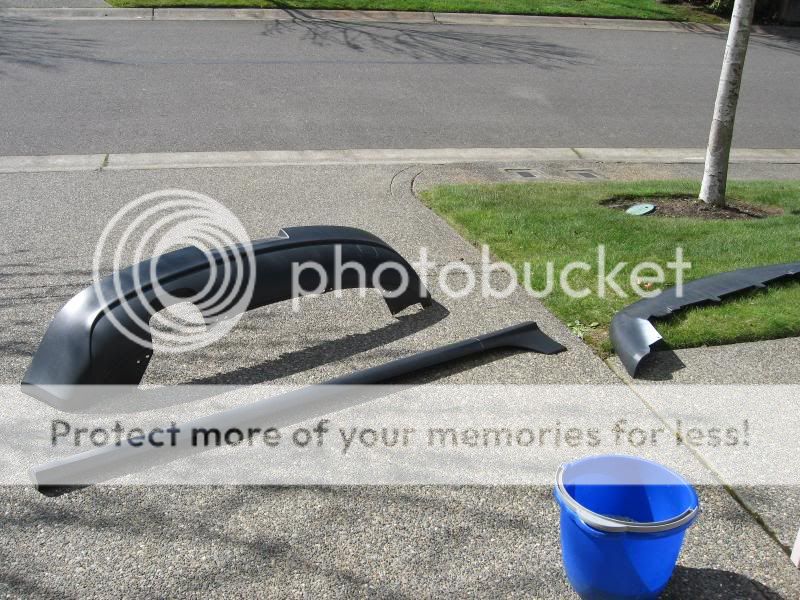
REMOVAL INSTRUCTION
Front Lip
a.) Start By Removing the hex screw attaching your fender well liner to the front bumper.
b.) Working your way around the under side of the front lip remove the hex screws that retain the lower lip to the underside of the bumper. (should be 6 or 7 total)
Note: While under your front bumper note how the lip fits over the rest of the plastic underside of the front bumper, this will be key when reinstalling.
c.) After working all the way around the bumper and removing the opposite side fender well screw you are ready to remove the lip.
d.) Grasp the lip inside of the fender well and pull towards you. You will need to pull relatively hard to remove the lip. (Wear gloves , i cut my hand up pretty bad with this next part) Using your had to keep the bumper seperate from the lip, work your way around the bumper pulling out on the lip as you go.
NOTE: the Center of the lip is a real BIOTCH to get off!
e.) Smile because you got the front lip off !
Side Skirts
a.) Remove the hex screws located in the front fender well (1) under the side skirt (3) NOTE : How they are attached to the circular openings in the side skirt, and finally the rear fender well (1)
b.) Starting in the rear fender well slowly pull the side skirt towards you and up. Key is UP as there is an additional attachment on the inside of the skirt that WILL break if you pull out only. Work the 3M tape loose from the upper portion of the side skirt.
c.) Pull up and out on the side skirt and it should fall off the car for you.
Rear Valence
NOTE: Alot yourself at least 45 minutes to 1 hour to uninstall this piece. I was able to leave the wheels on the vehicle for this portion but you may find it much easier to remove the wheels.
Great Removal Instructions Here!
http://www.namotorsports.net/docs/riegermkvgtirearapron.pdf
2.) Now that you have your parts removed its time to decide how you want the finish to turn out like. If you want it smooth you will want to follow every step in this DIY, if you dont mind the textured look skip all of the sanding and move to the cleaning... Your choice.
Smooth
Some members have said that they smoothed the surface out by using filler primer. This technique will work however i do not recommend doing that as it will only allow more opportunity to crack!
TO MAKE THIS FASTER I HIGHLY RECOMMEND BUYING AN ORBITAL SANDER!
a.) Starting with 180 Gritt Sand the bumps off of your pieces.
-Change your paper about halfway through each piece.
b.) Use 600 Grit to smooth the surface out even more.
When you are done the surface should feel smooth to the touch .
3.) CLEAN YOUR PIECES !! I used the following method.
a.) -Hot water
- Dishwashing soap ( to cut the grease)
-RINSE
b.) Clean Rag , Denatured alchohol, lots of elbow grease.
NOTE: be sure to let these pieces dry out all the way. Nothing will ruin your paint worse than a bead of water sneaking across your paint!
4.) Ready to start the painting process?
BEfore you start this section Practice with the extra can of paint on a piece of cardboard. Us a fanning motion and twist your rist away from the surface you are painting in a "flicking" motion. Each coat should overlap 50% of the last pass. This technique will provide a smooth coverage with no lines.
-
WAIT 5 Minutes and get your primer ready!
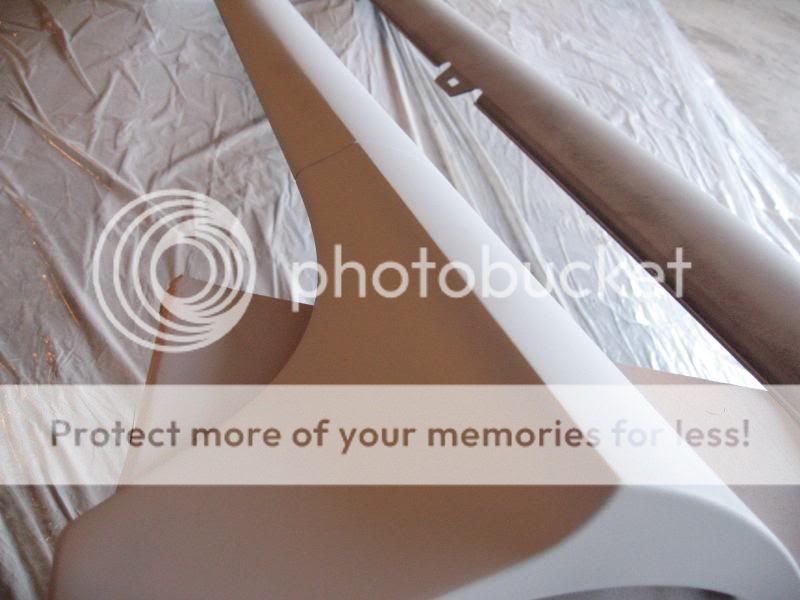
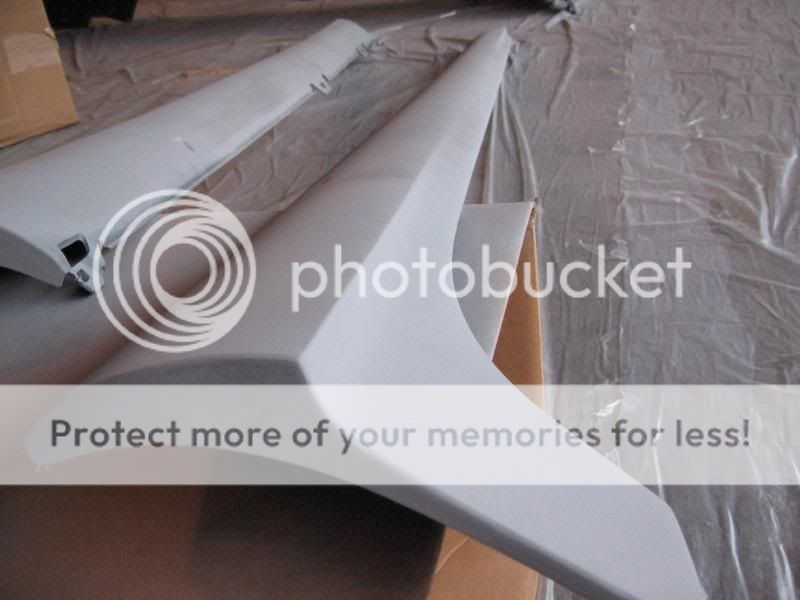
b.) I used 3 coats of primer 15 min flash time in between, hand sanding in between each coat with 600 gritt.
5.) After You allow the primer to dry completely (should only be around 15 minutes after your last coat.
Clean your pieces again with denatured alcohol and then with a lint free rag wipe them off.

Repeat the adhesion promoter step.
6.) I used 4 coats of color on each piece with 10 minute flash times in between. Start light on these coats. Your first coat should look like spots placed closely together all over the surface.
Your second coat should connect these dots and provide a light coverage over the entire piece.
Repeat for the third step.
Fourth coat should be laid down fairly heavy, be careful not to put any runs in your paint at this point.
ALLOW TO DRY FOR 2 -24hrs (mine dried over night)
7.) CLEAR COAT
Follow the same procedure for the first 3 coats of clear as you did in the color.
Your fourth coat should be significantly heavier than all of the others you have done.
Allow 20 minute flash times in between coats of clear.
YOUR DONE!!!!!
Let the pieces sit for several hours before re-installing as you have to press very hard on them to snap them back into place.
When reinstalling the side skirts remember to re attach the top section with a strip of 3M tape.
This picture looks as thought the colors are off however notice how well it matches in the sun as opposed to the shade. Variations due to camera and shade make it appear this way however it DOES MATCH PERFECTLY!


MORE PICTURES TO FOLLOW
MATERIALS:
300 Gritt Sandpaper X 4 pieces
600 Gritt Sandpaper X 4 Pieces
4 Cans of Duplicolor color code LB9A X 4
4 Cans of Duplicolor Clear Coat
3 Cans of Rustoleoum Sandable Primer (Light Grey)
1 Can of Duplicolor Adhesion Promoter
1 Roll of Tape
1 Roll of painters paper
1.) Remove all of your trim. Dont take the easy way out and just tape them off. It will come out bad , you will have tape lines, just take them off.
REMOVAL INSTRUCTION
Front Lip
a.) Start By Removing the hex screw attaching your fender well liner to the front bumper.
b.) Working your way around the under side of the front lip remove the hex screws that retain the lower lip to the underside of the bumper. (should be 6 or 7 total)
Note: While under your front bumper note how the lip fits over the rest of the plastic underside of the front bumper, this will be key when reinstalling.
c.) After working all the way around the bumper and removing the opposite side fender well screw you are ready to remove the lip.
d.) Grasp the lip inside of the fender well and pull towards you. You will need to pull relatively hard to remove the lip. (Wear gloves , i cut my hand up pretty bad with this next part) Using your had to keep the bumper seperate from the lip, work your way around the bumper pulling out on the lip as you go.
NOTE: the Center of the lip is a real BIOTCH to get off!
e.) Smile because you got the front lip off !
Side Skirts
a.) Remove the hex screws located in the front fender well (1) under the side skirt (3) NOTE : How they are attached to the circular openings in the side skirt, and finally the rear fender well (1)
b.) Starting in the rear fender well slowly pull the side skirt towards you and up. Key is UP as there is an additional attachment on the inside of the skirt that WILL break if you pull out only. Work the 3M tape loose from the upper portion of the side skirt.
c.) Pull up and out on the side skirt and it should fall off the car for you.
Rear Valence
NOTE: Alot yourself at least 45 minutes to 1 hour to uninstall this piece. I was able to leave the wheels on the vehicle for this portion but you may find it much easier to remove the wheels.
Great Removal Instructions Here!
http://www.namotorsports.net/docs/riegermkvgtirearapron.pdf
2.) Now that you have your parts removed its time to decide how you want the finish to turn out like. If you want it smooth you will want to follow every step in this DIY, if you dont mind the textured look skip all of the sanding and move to the cleaning... Your choice.
Smooth
Some members have said that they smoothed the surface out by using filler primer. This technique will work however i do not recommend doing that as it will only allow more opportunity to crack!
TO MAKE THIS FASTER I HIGHLY RECOMMEND BUYING AN ORBITAL SANDER!
a.) Starting with 180 Gritt Sand the bumps off of your pieces.
-Change your paper about halfway through each piece.
b.) Use 600 Grit to smooth the surface out even more.
When you are done the surface should feel smooth to the touch .
3.) CLEAN YOUR PIECES !! I used the following method.
a.) -Hot water
- Dishwashing soap ( to cut the grease)
-RINSE
b.) Clean Rag , Denatured alchohol, lots of elbow grease.
NOTE: be sure to let these pieces dry out all the way. Nothing will ruin your paint worse than a bead of water sneaking across your paint!
4.) Ready to start the painting process?
BEfore you start this section Practice with the extra can of paint on a piece of cardboard. Us a fanning motion and twist your rist away from the surface you are painting in a "flicking" motion. Each coat should overlap 50% of the last pass. This technique will provide a smooth coverage with no lines.
-
- Keep your hand a steady distance away from the surface and move at a steady pace.
- -Do not stop spraying until you complete your pass. Wait to shake the can after you have passed over the surface.
- -If your can starts to spit inthe middle of a pass stop, shake the can, and "check" spray it on your test piece. If it still spits its time for a new can.
- -Heavier does not mean hold the can closer it refers to moving the can slower across the surface.
WAIT 5 Minutes and get your primer ready!
b.) I used 3 coats of primer 15 min flash time in between, hand sanding in between each coat with 600 gritt.
5.) After You allow the primer to dry completely (should only be around 15 minutes after your last coat.
Clean your pieces again with denatured alcohol and then with a lint free rag wipe them off.
Repeat the adhesion promoter step.
6.) I used 4 coats of color on each piece with 10 minute flash times in between. Start light on these coats. Your first coat should look like spots placed closely together all over the surface.
Your second coat should connect these dots and provide a light coverage over the entire piece.
Repeat for the third step.
Fourth coat should be laid down fairly heavy, be careful not to put any runs in your paint at this point.
ALLOW TO DRY FOR 2 -24hrs (mine dried over night)
7.) CLEAR COAT
Follow the same procedure for the first 3 coats of clear as you did in the color.
Your fourth coat should be significantly heavier than all of the others you have done.
Allow 20 minute flash times in between coats of clear.
YOUR DONE!!!!!
Let the pieces sit for several hours before re-installing as you have to press very hard on them to snap them back into place.
When reinstalling the side skirts remember to re attach the top section with a strip of 3M tape.
This picture looks as thought the colors are off however notice how well it matches in the sun as opposed to the shade. Variations due to camera and shade make it appear this way however it DOES MATCH PERFECTLY!
MORE PICTURES TO FOLLOW