GOLFMK8
GOLFMK7
GOLFMK6
GOLFMKV

Golf R Detailed Tuning Guide and Build Thread

TAZZ1

Ready to race!
After postponing for more than two years I finally come up with my build thread, better late than never I guess… apologies for some crappy pics, but I had to dig way back to find them.

This thread aims to provide guidance and info as objectively as possible for anyone interested in tuning his Golf R up to what is commonly referred to as stage 2+.

Currently the car has the following mods:

- Stage1 tune (from two different tuners);
- Forge Twintake; (Removed)
- APR Carbonio;
- Sprintbooster;
- Scorpion de-cat TBE and Stage 2 tune;
- Alcon BBK upgrade and H&R spacers;
- Autotech HPFP and Stage 2+ tune;
- DSG reflash;
- CTS Turbo Throttle Body Pipe;
- HPA Haldex Competition Controller;
- RS4 HPRV;
- GFB DV+;

- Driver Motorsport Tune.

The list will likely be further expanded as I’ve got cool mods in the pipeline.

Car is currently making:
At all four wheels - 326hp / 357lbft (484Nm)
At the crank - 360hp / 392lbft (531Nm)

This is before installing the discharge pipe and lightweight pulley; expect 10 whp more

I will not detail other "minor" mods:
- Maniacs Carbon DSG Paddle extensions;
- R8 Coils + NGK Irridium BREIX7 plugs;
- Polar FIS Advanced Instrument Reading


I hope you enjoy it and find it useful!
 
Last edited:

TAZZ1

Ready to race!
0Km – Ground Zero

After waiting for 6 months, I finally took delivery of my 1st VW in December 2010. It’s a 2 door Golf R, DSG with sunroof, Bluetooth premium, finished in Rising Blue; here she is bone stock, brand new and shining (sorry, crappy old phone pic):


5,500Km – Superchips Stage 1

Did an early first oil and filter change at 5,000KM, and decided to dive-in ;). After much anticipation I visited my local superchips dealer and had it flashed with their shelf stage 1 map… Once the flash done, I took the car for a spirited run on an empty highway very late at night, but unfortunately I could not really feel much of a difference :/. I was told that the engine has to adapt to the new values requested by the ECU, and more so the AWD and ESP control modules need to adapt as well to the ECU and the engine etc… In the following 48 hours, I have had the chance to drive the car back and forth on familiar roads with a variety of uphills, twisties and straights so a perfect test ground… still no noticeable difference (if any) :(
I must say the local superchips dealer addressed the issue in a very professional manner, and the Superchips HQ in UK have been pro-active and sent “revised” versions of the map, but as much support as I was getting still I had no satisfactory result… finally a dyno run confirmed a very small amount of torque gained in the mid-range but just a single peak hp (!), the whole episode ended-up with me getting reimbursed, the car flashed back to stock, and a bitter feeling that I would have to keep the car stock after all…
:cry:


7,000Km – Upsolute Stage 1

After hearing loads of good feedback from local VW owners I decided to give the car a second chance and went to the Upsolute dealer (who has since then been my tuner). Once I told him about my bad experience with Superchips he agreed to flash my car to stage 1 for free, and I would pay him only if satisfied (talk about confidence:)). After the tune was uploaded I took out my car with very low expectations… The difference could be felt immediately :) My tuner even allowed me to drive the car for 2 days without paying him so that I experience even more power as the tune settles-in nicely.
The drive back home from work later that night was memorable; for the first time I felt ~300bhp in my Golf, that is something you never forget :D …. compared to stock there was a more urgent kick-in down low, followed by a constant power surge past 3000 and all the way through the red line without the usual power dip high in the revs. I remember really wondering why VW “killed” the power on that engine out from the box.
Bottom line, a proper stage 1 tune should be like a must-have factory option every R owner should tick straight away.
 

Attachments

  • Stock.PNG
    Stock.PNG
    350.3 KB · Views: 26,282
Last edited:

TAZZ1

Ready to race!
16,000Km – Forge Twintake

I got a few more miles under the belt after my 15,000KM third oil service (yes I do it every 5,000Km), and I decided it is time for a CAI; of course I was satisfied with my car’s performance but was not very happy with the idea that the restrictive oem air box could be rubbing me some HP. So I purchased at http://forgemotorsports.co.uk and installed the newly released Forge Twintake which has been running great on many Seat Leon Cupras over here.

Install:
I have to say quality of the kit is really remarkable, the twin canisters in glossy carbon look amazing in the engine bay! Fitting is pretty good, with very minor adjustments to be made to avoid rubbing and touching with other engine components. Installation was a breeze except for removing the engine cover which is a bitch! (I would advise to do it when the engine is warm as it loosens up the rubber bushings). Esthetically the only downside IMO is the FSI engine looking really ugly naked… the only way around that is to install a custom engine cover or trim the intake tract / air box and re-fit the oem cover.


Outcome:
After taking the car for a drive I noticed the sound might not be as dramatic as some other systems, but nevertheless, I don’t care what other people say, that kit is noisy (in a good way:)). On boost there is a pretty audible induction and down low some good turbo fluttering noise.
Performance of this kit was quite surprising; I know that an intake is never going to make a night and day difference, but I could definitely feel very decent gains in the upper range, you can really tell that on boost the car breathes much better! Past 5,000 you feel the car literally gaining new momentum as if the rev range is too short and the engaged gear wants to keep on going. When driven hard my car became more aggressive and eager to rev.
When driven normally at low revs though the car felt less snappy off tick and below 2,500; this is common of all CAI with enlarged intakes tubes and non-stock MAF housing.
Bottom line it gave the R an old-school turbo feel with no-juice followed by sudden turbo kick which holds better in the high end.

A few days later I checked all fittings and discovered that the aluminum edge of each canister was completely “crushed” (except from the one connected to the silicone bend)!:(
After some research I noted that the Golf R kit comes with a new set of canisters with aluminum edges and foam filters instead of hard plastic edges and cotton filters like in the previous models.
A few e-mails to Forge UK (who have been quite helpful by the way) revealed that it is actually due to tightening the clamps too firmly which is ok when the engine is cold, but caused the aluminum edges to be crushed as the whole system gets hot. The solution would be to avoid tightening the clamps too firmly.
Forge then sent me free of charge a set of the older filter models with hard plastic edges. I had thought that my canisters looked great, but when I received the older model, I realized that in fact the new model looks like shit. The older model is just miles ahead in terms of quality and it is clear that Forge’s decision to update them on the Golf R kit was to cut on cost. Anyhow all installed and I am up and running again :D


A week later I purchased a VCDS to log my car. I first check my fuel trims (MB 032) and I am shocked to read that my short term adaptation fuel trims reach +14.5% :O :O. Long story short, thorough checkup and testing revealed that my car had no post MAF leaks or any hardware issues at all (I had very low mileage and maintained the car in mint condition). Later on I discovered that this was a common issue on Golf Rs with the Wintake, Twintake and VWR due to the MAF housing and tube section (http://www.vwgolf.net.au/printthrea...0772-Aftermarket-Intakes-and-Fuel-Trim-Issues), … In conclusion the Twintake sadly had to go and with it some of the nice gains :(


Attachments

  • twintake4.JPG
    twintake4.JPG
    288.9 KB · Views: 22,609
  • twintake5.JPG
    twintake5.JPG
    105.4 KB · Views: 20,773
  • Twintake 3.JPG
    Twintake 3.JPG
    225.2 KB · Views: 21,416
  • twintake6.JPG
    twintake6.JPG
    204.5 KB · Views: 20,659
Last edited:

TAZZ1

Ready to race!
19,000Km – APR Carbonio

Obviously I was not very happy back with the OEM intake, but was still recovering from my Twintake experiment, so I decided to play it “safe” and try out the APR Carbonio as it retained the factory MAF housing. Now I had read around that the Carbonio did not make any difference, so again my expectations were very low.

Install:
Installation was fairly easy given I got used to removing the engine cover. Instructions provided are clear. Visually the whole system looks pretty clean and neat. Also compared to stock the snorkel is much less restrictive and shoots all the air in the airbox as opposed to the OEM one which shoots part of it into the engine bay. I also tried to “optimize” the Carbonio by applying some DEI gold heat reflector tape.


(sorry that last pic is actually more recent than the time of install)

Outcome:
After driving the car, I quickly saw the difference with both stock and the Twintake;
In terms of top end power gains the Carbonio cannot compare to the Forge Twintake, that I already knew and can confirm. It did however offer a better every day drivability due to having stronger torque in the low revs which is of course a plus. Also the Carbonio is much quieter than the Twintake and it suits me better since I am not a big fan of loud noises in a daily driver.

Compared to the OEM intake, it had an uncompromised low-end and I did feel the power delivery more linear with a slight improvement up top. Since that contradicted most reviews, I logged MAF readings (MB 002), and Fuel trims (MB 032) in several runs to make sure this is not a placebo effect. Below are the results (3rd and 4th gear runs in near identical conditions);
OEM:
002: Peak MAF between 238.x g/s ~ 240.x g/s
032: Long fuel trim +1.4%, Short fuel trim -3.0%

Carbonio:
002: Peak MAF between 244.x g/s ~ 247.x g/s
032: Long fuel trim +1.4%, Short fuel trim +0.8%

.
No placebo effect here, the kit works just fine with an increase of 6 to 9 g/s and a good jump in the fuel trims as well:). Maybe most “negative” reviews where made on KO3 MK5 GTIs and things are not the same on a KO4 running stage 1 boost levels? Anyhow the increase means that the Carbonio works and does make a difference on my car, this is a link which aligns with my results and has very good info and pics. http://forums.vwvortex.com/showthre...-Modifications-for-Hardcore-Enthusiasts/page5
In conclusion while the APR Carbonio is not a true CAI, it is an improvement and upgrade on the OEM intake which I am pretty satisfied with.
 

Attachments

  • carbonio 1.JPG
    carbonio 1.JPG
    462.7 KB · Views: 22,960
  • carbonio 2.JPG
    carbonio 2.JPG
    181.5 KB · Views: 20,510
  • carbonio 3.JPG
    carbonio 3.JPG
    241.2 KB · Views: 21,181
  • Carbonio 4.JPG
    Carbonio 4.JPG
    414.2 KB · Views: 22,041
Last edited:

TAZZ1

Ready to race!
22,000Km – Srpintbooster

I have been reading a lot about this Srpintbooster device; all the people who tried it loved it and most people who didn’t hated it. I wanted to find out if this really worked as reviewers claim, and purchased it from http://sprintboostersales.com/.

Install:
Installation was pretty easy, took me 12 minutes with only a Swiss knife and wiring tape. Since the instructions provided are generic to most type of cars and do not apply for the golf R specifically, I am detailing them:
1- Unlock the car and keep the door open for about 5min to avoid throwing an error code once the sensor is unplugged;
2- (Only for right hand drive cars, does not apply for UK AUS and Japan) Unscrew small plastic protection plate behind accelerator;
3- Unplug the accelerator plug (small plug just behind the pedal) by lifting up the small red lock on it then pulling out the whole plug (make sure to pull the plug not the wires);
4- Connect the sb where the plug used to, and connect back the plug to the sb (it should lock back the way it was);
5- Connect the remote button wire to the sb (this is actually optional and just to take advantage of the green-red-off functionality otherwise sb is factory set by default to red) u can always plug in the remote later to change the setting then unplug it, sb will save and keep the last selected setting;
6- Fix the remote wherever u wish using the double sided tape provided in the kit (actually depending on where u chose to install it, u might want to feed the wire before connecting the remote to the sb) i chose the tray underneath the steering wheel as a stealthy location;
7- If step 2 was required, u'll need to drill a tiny hole on the plastic cover to relocate the screw so the plate sits back without touching the plug (it’s very easy with any pointed blade)


Outcome:
As soon as I drove away, I pressed the button to the off position to see if the car behaves normally, the intent was to make sure the “physical presence” of the sprintbooster does not impair throttle response (or for example intentionally worsens throttle feel to amplify the "wow" factor when it is on). Throttle response was indeed unchanged.
After that I switched the button to Green. I immediately noticed an improvement in throttle response, the effect is more felt throughout the gears. The car felt less laggy, more snappy, and had a much more enjoyable drive feel to it:) Then I turned it to Red :D it felt almost ridiculously aggressive lol. If it makes any sense in Red the car feels like it’s pissed-off and angry reacting violently to the slightest throttle input. So the Sprintbooster DOES seem to work, pretty well I would say :thumbup:
Under WOT I felt no difference whatsoever: Sprintbooster is more an improvement for normal everyday driving under partial throttle (which is how most of us drive 90% of the time). Because of the increased sharper response, and the fact that u get more “bang for your pedal application”, u do feel the car is “faster” and more aggressive with a more pronounced urgency in the acceleration; from the driver's perspective it also greatly eliminates the presence of turbo lag. Actually I would go to the point of saying that this device does its job so well that people are fooled into thinking it has actually given them more power, while in fact it hasn’t.
Having verified the result, I will try to explain how this device works:

WRONG LOGIC - TRUE FACTS:
The sprintbooster is a crappy "power" upgrade; it will not make a car faster, it does not increase power or torque, u can do the same thing for free by applying more right foot on the accelerator...

RIGHT LOGIC - TRUE FACTS:
The sprintbooster is actually NOT a "power" upgrade and does not make a car faster. It's a drivability upgrade (same as a Haldex controller), it gives an improved, sharper throttle response which CANNOT be achieved by applying more right foot on the accelerator as doing so would defeat the purpose: from a driver's standpoint, improved throttle response means by definition having more response for less foot application (i.e. WITHOUT having to stomp more on the pedal to get such response).

Improvements actually make sense once you understand how this device works:
Most modern cars don't use a throttle cable but a drive by wire electrical system; I’m no expert, but roughly when u depress the accelerator a voltage signal is sent through the plug sitting behind your pedal to the ECU which then applies the necessary parameters to the engine depending on the intensity of the signal. The more you depress the pedal the higher the signal… Fact is the drive by wire system is not very sharp or responsive that’s why many sports cars come factory fitted with a sports button (S in the RS4 B7 and M in the BMW M5) which simply acts as an amplifier of this electrical signal.
Sprintbooster does exactly the same thing; if you depress the accelerator by say 10%, which normally equates to a certain voltage signal, it increases that signal so that the ECU receives a voltage equivalent to that of a pedal being depressed by say 25%. The ECU then applies accordingly the parameters corresponding to 25% pedal depression where the driver in fact only applied 10% on the pedal initially. On full throttle signal is the same though (100%), the sprintbooster does not exceed the throttle body limit achievable with your right foot, it just gets there faster and that is a good thing cause it won’t interfere with timing or boost or any other parameter of the engine map.
Bottom line if that makes any sense, just like a tune is a remapping of the engine parameters, a sprintbooster is a remapping of the throttle signal parameters. If you expect to gain hp look elsewhere... but if you wish to have a sharper more enjoyable, aggressive and responsive drive, I highly recommend this simple mod!
 

Attachments

  • Sprintbooster1.png
    Sprintbooster1.png
    303.3 KB · Views: 20,127
Last edited:

TAZZ1

Ready to race!
26,000Km – Scorpion cat-less Resonated TBE and Upsolute Stage 2

As most of you must know, it is very hard to stop modding once you start… So after long hours of browsing and searching, I finally decided to take my tune to the next level at Stage 2 which requires an aftermarket performance downpipe, preferably with a sports catback. I chose the scorpion TBE, without a cat (it is not mandatory where I live), but resonated to keep things a bit civilized. I went for the scorpion as it was “cheap” and easy to procure from Forge UK (http://forgemotorsports.co.uk), but mostly because it is a full 3inch system (Milltek is 2.75 on the cat back section) and has a lot of good reviews.

Install:
Of course I had this done by a professional, so cannot really comment here, except that fit and finish were pretty spot-on. Due to the AWD shaft things are pretty tight down there though!
The twin tips finished in polished steel fill the rear valance and make the stock pipes look like garden hoses.
After the install was done my tuner was already here with the Upsolute stage 2 file :)


Outcome:
OMG, what a noise! :happyanim: At idle and below 3,000 rpms it sounds nearly identical to stock with a slightly more pronounced growl. Past 3,000 it’s a different story; there is an angry addictive warble. The DSG fart now sounds like deep BURPS at low revs and exuberant CRACS closer to red line. Sorry I have no uploadable sound clips, but there are plenty over the internet.
More importantly, I noticed significant power gains and an improvement in power delivery :D to my relief low-end and mid-range torque has noticeably increased (making for an improved drivability which is always very important to me) and top end power is simply mad! Turbo spools faster and boost seems to hold better.
On the recommendation of my tuner, I allowed 3 days for the car to adapt, and indeed all settled-in quite nicely.
Of course a stage2 Golf R will make for a fast drive by any standards, but frankly I did not expect that much; the car literally felt as if it cannot be any faster :thumbup: (obviously I was about to find it could :p)
 

Attachments

  • scorpion 6.JPG
    scorpion 6.JPG
    338.4 KB · Views: 19,340
  • scorpion 5.JPG
    scorpion 5.JPG
    108.7 KB · Views: 19,271
  • scorpion 4.JPG
    scorpion 4.JPG
    106.2 KB · Views: 19,331
  • scorpion2.JPG
    scorpion2.JPG
    164.8 KB · Views: 19,308
  • scorpion1.JPG
    scorpion1.JPG
    122.4 KB · Views: 19,398
  • scorpion 3.JPG
    scorpion 3.JPG
    175.7 KB · Views: 19,315
Last edited:

TAZZ1

Ready to race!
30,000Km – Alcon Advantage Extreme 4 piston 365mm BBK and H&R Trak+ 10mm spacers

When you go fast you have got to stop fast as well! Not that the Golf R brakes are not good, but just like the Golf R not being slow doesn’t mean you don’t tune, same principle applies to brakes ;)
I needed to change my front brake pads, I’ve been on the look-out for a BBK for a while and the time was also appropriate for my financials. Read a lot on TEFF’s (whom I thank by the way) build thread about BBKs and I chose the Alcons since TEFF tried a whole bunch from Porsche to AP racing and settled for the Alcons as the “best” kit he had tried. I ordered the kit from JDL-Brakes (http://www.jdl-brakes.com/) who listed it as a specific kit for the Golf R, Daniel the owner is very helpful.

Install:
The kit is a direct replacement and comes with all parts supplied including DOT5.1 brake fluid, upgraded brake lines and Pagid 9-2 fast street pads. Installation was quite simple for the shop and took about 3 hours in total. The Alcons are also noticeably lighter than the OEM brakes (around 5-6Kg per wheel).

IMPORTANT NOTE: the OEM Talladega 18 inch wheels will NOT clear the calipers unless you install a 8 or 10mm wheel spacer (total wheelbase extension of 16 to 20 mm).
I preferred going for 10mm spacers cause it looks nicer, and is safer for clearing the calipers and at the same time does not cause any tire-fender rubbing (with euro OEM suspension that is). I purchased H&R Trak+ spacers made in a special proprietary alloy lighter than any other wheel spacer on the market.

The result was a perfect flush look that's made the car's stance so much nicer!


Outcome:
As for the brakes themselves, in one word … just AMAZING. Stopping power is huge, with a nice hard pedal feel. After completing the brake bed-in procedure as per Alcon recommendation, I tried some abusive braking; and I can tell you these brakes are simply phenomenal, no matter how hard I pushed them, they never showed any sign of fading, not even a squeaking noise (they are really quiet by the way as the RS9-2 pads come with anti-squeal shims). With time they literally transformed my way of driving the car, as they gave me even more confidence, (which is not necessarily a good thing ;)).
In normal driving I was especially relieved to see that cold performance during city-driving is excellent and even better than stock, this is because the Pagid RS9-2 are fast street pads and not track pads (not to be confused with the yellow Pagid RS29).

Later I decided to add a little funky touch to the calipers; I hope you like it ;)


Attachments

  • Alcon1.JPG
    Alcon1.JPG
    165 KB · Views: 19,615
  • Alcon2.JPG
    Alcon2.JPG
    242.2 KB · Views: 19,392
  • Alcon3.JPG
    Alcon3.JPG
    171.8 KB · Views: 19,206
  • Alcon4.JPG
    Alcon4.JPG
    343.1 KB · Views: 23,308
  • Alconyellow2.JPG
    Alconyellow2.JPG
    411.8 KB · Views: 27,083
  • Alconyellow3.PNG
    Alconyellow3.PNG
    211.6 KB · Views: 19,193
  • Alconyellow1.JPG
    Alconyellow1.JPG
    304.8 KB · Views: 19,062
Last edited:

TAZZ1

Ready to race!
35,000Km – Autotech HPFP Upgrade and Upsolute Stage 2+

As I’ve been reading about how the HPFP in the FSI system hits its limits beyond a stage 1 tune, and how upgrading it yields substantial gains in the mid-range, this upgrade has become inevitable for me. Obviously the most two popular options were the APR unit, and the Autotech one. I chose Autotech; why? Well many people I know have been running the Autotech for very long without a single issue; actually the only rare issues were due to the OEM pump being pretty worn and used before the upgrade. So obviously considering upgrading my existing pump was not an option, and I was therefore left with only the fully built unit if I chose APR. On the other hand I was able to source (i) a brand new OEM pump plus (ii) the Autotech upgrade BOTH landed and installed for 340$ less than the APR unit and get to keep my stock HPFP. Finally my tuner happened to have a few Autotech units in stock while I had to order wait and ship the APR pump, so all in all it was a no brainer.


Install:
We did the upgrade of the new OEM pump first, in a clean environment as per recommendation of Autotech, it is not really complicated if you follow the instructions carefully. Then we just swapped pumps by removing the one on my car and replacing it by the upgraded one. The install was done by a professional; I noted the particular care is required to depressurize the FSI system.
We of course changed the cam follower for a new one; and actually I was surprised that the follower coating had completely worn after such low mileage!


As always my tuner had prepared the Upsolute upgraded tune (Stage2+) and we flashed it on the spot.

Outcome
As expected the result were pretty obvious right away; there was more torque earlier in the revs, and much more especially in the mid-range. A great thing I noted was that, unlike other bolt on mods the gains offered by the HPFP were felt throughout the entire rev range; there was more power at all rpms, as if the car was further flashed all over again:thumbsup:. While I was very satisfied with the result, and the car certainly felt more powerful everywhere, I have to admit that it didn’t feel THAT much more powerful everywhere. My tuner informed me that this was most likely due to my DSG torque limitation keeping power below a prescribed limit, and that Upsolute was about to release a DSG re-flash soon that would allow me to benefit from all the torque gains.
Below are my fuel pressure log curves;
Before:


After:


Attachments

  • Autotech 1.JPG
    Autotech 1.JPG
    117.2 KB · Views: 18,750
  • Autotech2.png
    Autotech2.png
    342.5 KB · Views: 18,783
  • Autotech3.png
    Autotech3.png
    372.4 KB · Views: 18,682
  • Autotech4.png
    Autotech4.png
    360.9 KB · Views: 21,327
Last edited:

TAZZ1

Ready to race!
38,000Km – Upsolute DSG re-flash

A few weeks on my stage2+ upgrade, my tuner called to inform me that Upsolute had released its DSG reflash if I wanted to try it. He informed me that it would include various features such as faster and smoother shifts, rev limiter increase, modified launch control procedure and most of all torque limitation removal.
As I really wanted to benefit from the ”full HPFP effect” I booked an appointment, and got the DSG re-flash uploaded. The process took about 20 minutes reading and 20 minutes writing while connected online to the Upsolute server in Austria.

Of course I was first concerned by exceeding the torque limits of the DSG, but fact is; having dealt with them for over a year, Upsolute is one of the most conservative and "safe" tuning companies; they often refuse to increase the power outputs on their maps when so requested (let alone my tuner), and they informed us that the DSG box has been reliable up to stage 3 power levels.

Outcome:
As soon as I drove away, the first difference I felt was a huge change in the amount and delivery of torque! As low as 2,500 rpms the car pushed literally like a train, and beyond 3,000 there was an enormous consistent and uninterrupted surge of torque till red-line… now a 7,200rpm redline ;);) the car was taking full benefit of the HPFP and all other mods and now truly felt in an entirely different league. Not that before my R was slow, but I came to the realization that at stage2+ levels, DSG cars actually give you 80% of the juice because of the electronic limitation WV writes into the DSG mechatronic control module, the DSG re-flash gives you the remaining 20%, and brings you to full potential. This is a must do upgrade any DSG pushing more than a stage 2 tune.
I also noted that the shifts were crisper than ever, and that the entire box was a lot smoother.
I am yet to try the uprated Launch Control procedure, but I'll update as soon as I do :)
 
Last edited:

TAZZ1

Ready to race!
42,000Km – HPA Haldex Competition Controller

As most of you know, HPA has developed two performance controllers for the Gen4 Haldex; a standard performance version, with three selectable modes: race, stock, and eco, and a competition version with no selectable modes that comes locked in race. While the competition version is calibrated to offer the same race mode as in the standard performance version, it has the additional feature of retaining rear driveline engagement and increasing clutch torque when braking. By doing so, wheel brake torque is now transferred rearwards through the AWD clutch, offering a far more aggressive deceleration capability. Additionally, according to HPA the Competition controller will support left foot braking without disengaging the 4-motion clutch while out on the track, key advantages for sporty driving.
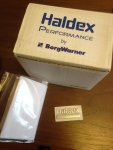
I have greatly improved drivability and power of my car so far, but understeer remained a major downside, especially with the added muscle. So a month ago, I ordered from CTS Turbo the HPA Haldex Competition Controller here: http://www.ctsturbo.com/cart/products/Haldex_Gen4_Race_Module-3473-560.html.

I purchased the competition version vs the standard one with selectable modes for three reasons: 1- I have no use for the three modes (stock defeats the purpose of spending shy of $1,000 for this part, and Eco is not really going to do any difference to my fuel consumption with all the power upgrades) 2- the installation of the competition controller is simpler with no wires or selector to drill onto your dashboard, and 3- the rear driveline engagement under braking should prove a substantial advantage for daily driving.
Note: For golf R you need to purchase Haldex controller marked with OBR coupling, (part number 115105 at CTS), TTRS owners will purchase the OBY coupling unit.
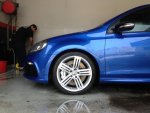
Install:
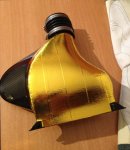
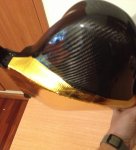
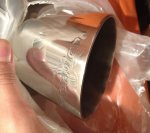
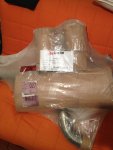
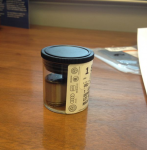
Though it is pretty simple and will take 15 minutes at most, I advise you to do that in a professional shop as some of the Haldex coupling oil will spill in the process. The kit consists of a control unit, a gasket and a valve to be fixed onto the control unit, sorry was too excited to take any pics during install but these are the steps:
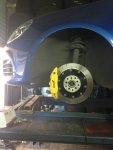
1- Raise the car;
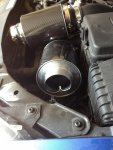
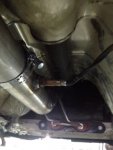
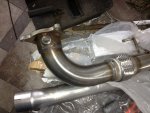
2- Clean the area around the OEM Haldex control module;
3- Unplug the two sensor connectors on the back of the OEM control module (this was the tricky part, you’ll need small fingers);
4- Unscrew the two allen bolts which fix the control module to the coupling unit;
5- Remove the OEM unit and have a clean recipient prepped under the OEM controller, cause you will lose a bit of coupling oil while doing so;
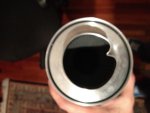
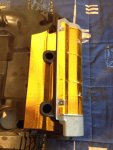
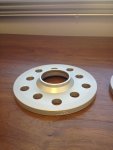
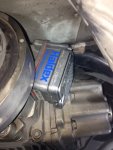
6- Install the Upgraded unit, it’s plug and play, and affix the two Allen bolts loosely. Important: do NOT mix the HPA unit with the OEM valve; each unit comes paired with its valve!
7- Plug the two sensors on the back of the HPA unit (you will need to hear an audible click), tighten the Allen bolts and voila:)
8- I used a syringe with rubber nozzle to “re-inject” the oil spilled in the process.


Outcome:
First of all, if you expect the Competition Controller to turn your car into a Camaro, look elsewhere; the Golf R is still an “AWD Automobile made by ze Germanz”. What the competition controller does on the other hand, is transform the car’s behavior subtly but completely; it’s the same, but so different at the same time. Put simply, and if it makes any sense, the Golf feels more like an AWD BMW rather than an AWD VW :rolleyes:.
The first obvious effect that you will notice is that when you accelerate while turning, the tail kicks out much more easily than before, you can say that there is more power going through the rear wheels; that was of course to be expected, and it works pretty well.
But the constantly present and dominating effect is the much more neutral balance and feel of the car overall even under normal driving; as you turn you literally feel that the front end and the rear end are symmetrically pivoting around a vertical axle in the middle of the car, and THAT is an amazing improvement and completely cancels understeer! :happyanim::happyanim::happyanim: If anyone tells you that under normal driving the car is the same, that person has no clue whatsoever.
I think this might not be the case though with the standard performance controller as it is likely due to the rear driveline engagement under braking and deceleration (featured only with the competition controller). If so then HPA ought to highlight that characteristic a lot more, cause it will make a substantial difference not only on the track but first and foremost in the way your car always behaves everyday all the time under normal driving.

Under spirited driving, even without sliding, instead of the familiar feeling of being pulled out of corners you feel you are actually being pushed from behind, and I am happy to report that understeer is no more. Again, car feels extremely different yet the same.
I have not tracked it yet, but I can tell you that when you push things further the rear will slide more, and much sooner.
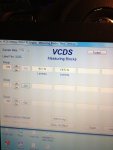
The ONLY downside comes from my car actually… as a MY2011 I cannot completely disengage ESP:mad:, same for 2010, and sadly the recoding option using VCDS does not work for all production date cars prior to July 2012!:cry: So whenever I exceed a certain limit with ESP “restricted” it puts me back in check ….
Oh well nothing is perfect I guess, I might go to the point of changing the ESP control module lol….

Bottom line, the HPA competition controller is one of the best upgrades I have done to my car and I highly recommend it, especially if you can deactivate your ESP!:thumbup:
 

Attachments

  • haldex1.JPG
    haldex1.JPG
    145.2 KB · Views: 19,225
  • haldex 2.JPG
    haldex 2.JPG
    125.7 KB · Views: 20,211
  • haldex 3.JPG
    haldex 3.JPG
    107.6 KB · Views: 19,933
Last edited:

TAZZ1

Ready to race!
42,000Km – CTS Turbo Throttle Body Pipe

After talking to some heavy-tuned members of the local EVO and STI crew, they were all surprised that I had gone all this way and did not upgrade what they considered as the first and foremost “basic” components; the aircharge TBP and discharge TOP pipes. I was not too convinced at first, but after some research I read that many tuned VWs have changed these with great results. I decided to give these a try; and would start fist with the charge pipe aka throttle body pipe, first cause I was not sure if the pipes were a great mod, second because the throttle body pipe can potentially allow for future addition of water meth injection, and third because my tuner could easily procure the CTS TBP (wich is also why I went for CTS Turbo).

Install:
Installation was not too difficult, but not as easy as you might think.
From above:
1- First remove the DV plus all sensor plugs to reach the recirculation tube that connects to the OEM TBP;
2- Loosen and disconnect the elbow hose that connects to the throttle body (that was a bitch);
3- Disconnect the MAP sensor plug from the OEM TBP;
4- Unscrew the top screw of the TBP.

Then raise the car and from beneath:
1- Loosen and disconnect the rubber hose that connects the TBP to the Intercooler;
2- Unscrew the bottom screw of the TBP;
3- Remove the OEM TBP by pulling it down carefully;
After that, on the CTS TBP:
1- Remove one of the rubber bushings from the OEM TBP and install it on the CTS TBP,
2- Unscrew the MAP sensor from the OEM pipe and reinstall it on the CTS pipe;
3- (If you are not installing water meth injection) screw-in block-off plug on the CTS TBP.

Repeat steps above in reverse order to install the CTS TBP.

NOTE: the CTS silicon elbow hose provided with the kit was too narrow to fit the throttle body inlet comfortably, so I just reconnected the OEM hose. Also I did not block off the recirculation noise pipe. So the whole system looks pretty stock and stealthy.

Outcome:
The TBP does make a difference, car has an entirely better feel when boost comes on, throttle response is improved, and it feels like the car is holding better boost on the top end :) Turbo spool is also a bit louder. Bottom line; a very worthy little mod that I should have done long ago.
I have also read that TBP and TOP work better together, so I am considering the discharge pipe now, and since the TBP comes equipped with a water meth bung, I might as well go that way… mmm good projects in perspective :rolleyes:
 
Last edited:

Djunited1

Go Kart Champion
nice build thread bro. Marina? :p
 

Bozz

Go Kart Champion
TAZZ great writeup. Do you have a pic of the car from the front (and/or back), with the spacers installed? I'm interested in how flush with the flares it is. Similar to TEFF's?
 
Top